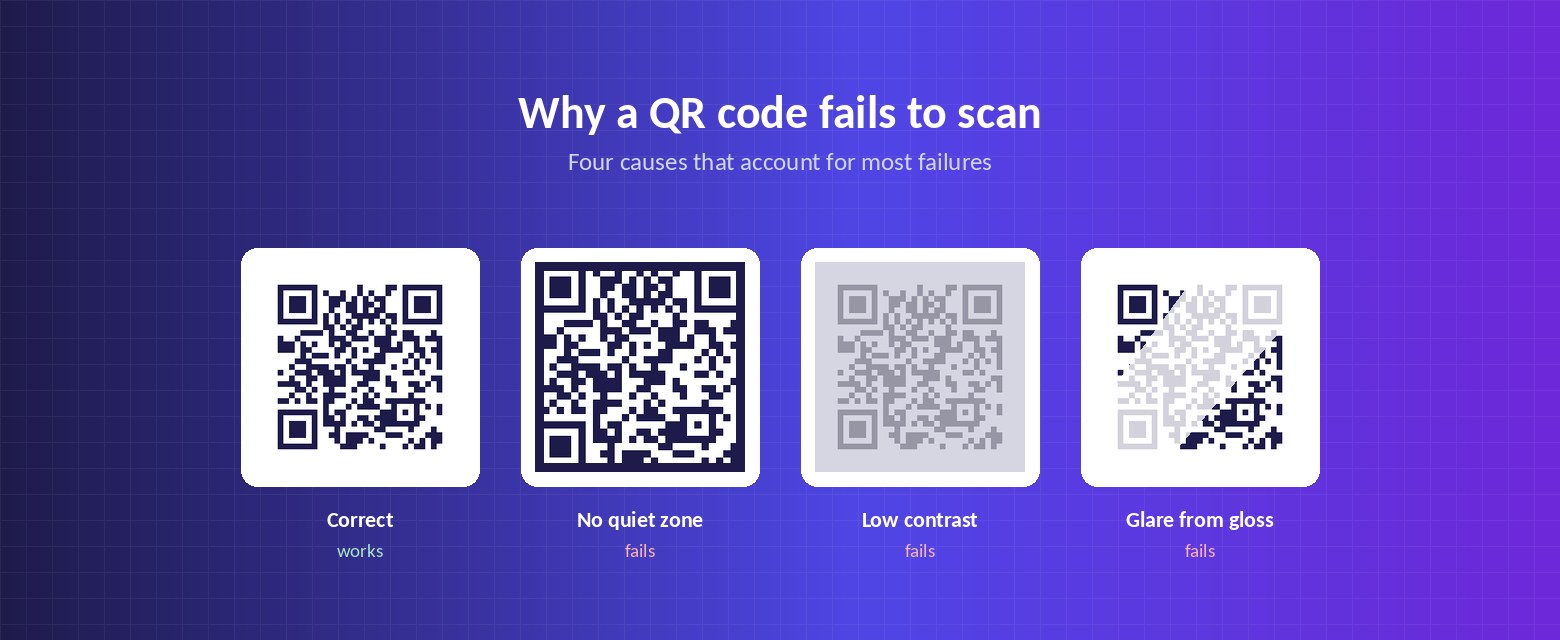
Most scanning failures come down to five things: the code is too small for the distance, there is not enough contrast between the pattern and its background, the quiet zone around it has been crowded, a gloss finish is reflecting light into the camera, or the code scans fine but the destination is broken. Work through them in that order.
First: does it scan on screen?
Before investigating the print, open the original file on a monitor and scan it from there. This splits the problem in half.
If it scans on screen but not in print, the fault is in size, surface or printing. If it fails on screen too, the code itself or its destination is the problem, and no amount of reprinting will help.
Cause 1: too small for the distance
The most common cause by a wide margin. A code is designed and approved at desk distance, then installed somewhere it is read from much further away.
Apply the 10:1 rule — the code should be at least a tenth as wide as the scanning distance — and remember it is a minimum. A shelf-edge label read by someone standing in an aisle is not being read at desk distance.
Cause 2: not enough contrast
Scanners need a clear light/dark distinction. Aim for a contrast ratio of at least 4.5:1, with a dark pattern on a light background.
Two specific traps: brand colours that look strong to the eye but are tonally similar, and inverted codes — light pattern on a dark background. Inverted codes are visually striking and many scanners have historically struggled with them. If the design calls for dark, put a light panel behind the code rather than inverting it.
Cause 3: the quiet zone is crowded
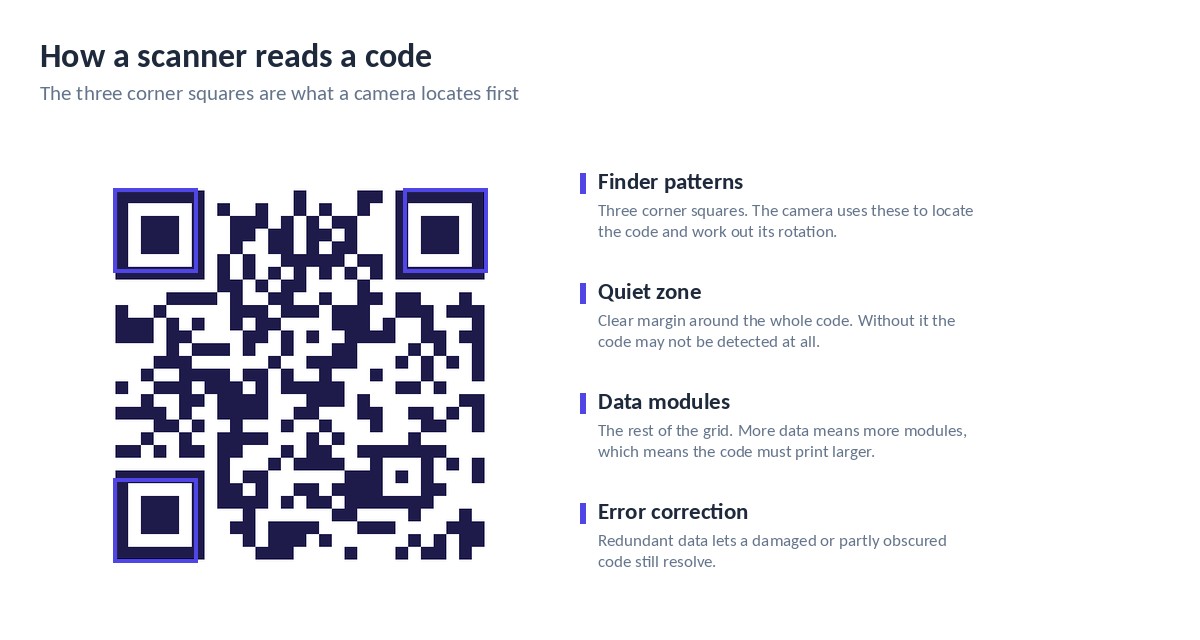
The code needs a clear margin of at least four modules on all four sides — roughly 8–10mm at table size.
A border, a caption tucked in tight, or a busy background photograph running under the edge of the code can all stop it being detected. This one is easy to miss because the code itself looks perfect; it is the space around it that is wrong.
Cause 4: the finish is reflecting
Gloss lamination, spot UV, varnish, metallic foil and mirror substrates all throw a specular highlight back at the camera. The angle that causes it is usually the exact angle a person naturally holds their phone.
The fix is a matte finish over the code area, or having the varnish knocked out over the code. This is worth specifying at artwork stage — it costs nothing then and is impossible to fix afterwards.
Cause 5: the code scans but nothing happens
If the phone recognises the code and shows a URL, the pattern is fine and the problem is the destination.
- The page was deleted or moved — check for a 404.
- The URL was typed with a mistake when the code was generated.
- The site is HTTP-only and the phone blocked it, or HTTPS with an expired certificate.
- The redirect service behind a dynamic code has stopped resolving.
- The page loads but is unusable on mobile, which reads to the user as "not working".
Cause 6: print quality
Codes printed from a compressed JPEG pick up artefacts around the module edges. Always print from vector — SVG or PDF — or from a high-resolution PNG at 300 DPI or more.
Ink spread on absorbent stock, particularly flexographic printing on corrugated, thickens the dark modules until they bleed into the light ones. If you are printing on anything absorbent, get a proof from the actual production process rather than a digital mock-up.
A quick diagnostic order
Work through it in this sequence, because each step rules out a class of causes:
- Scan the original file on screen. Fails? The code or destination is wrong, not the print.
- Measure the code and the real scanning distance. Apply 10:1.
- Check the margin around the code is genuinely clear.
- Tilt the print under the light. If it flares, the finish is the problem.
- Scan with three phones, including an older one.
- Open the destination URL manually on a phone.
Create a QR code free
Dynamic codes you can edit after printing, with scan tracking. No card needed.
Open the generator